| |
|||


| tutorial | |||||||||||||||
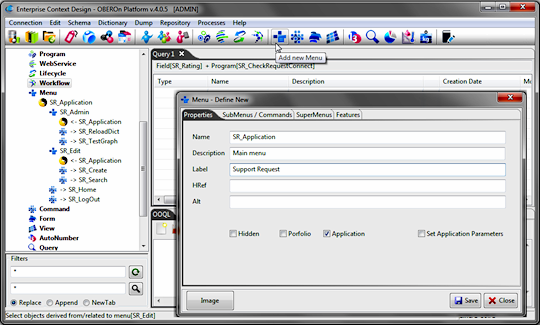
create an OBEROn applicationOBEROn discerns the user interface into two levels: The basic element of a generaic OBEROn application is the user menu because it defines most of the actions that a user can perform after the login. The menu structure is a tree where the root represents the application itself. For creating an application menu you have to define all nodes of the menu tree: each node in the tree can be represented with a menu element or a command elements. Users enabled
to manage Menus (see user
access rights
The equivalent OOQL
command
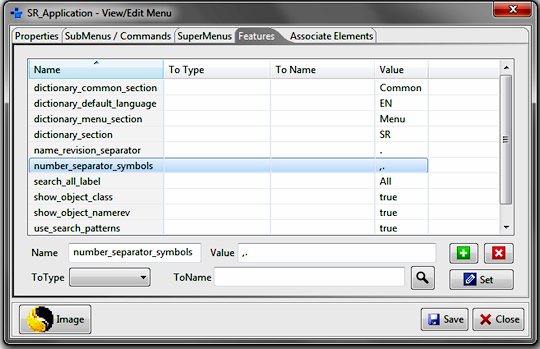
You can have three typologies of menus: For portfolio menu and/or application menu you may define some parameters required for the detailed level of user interface.
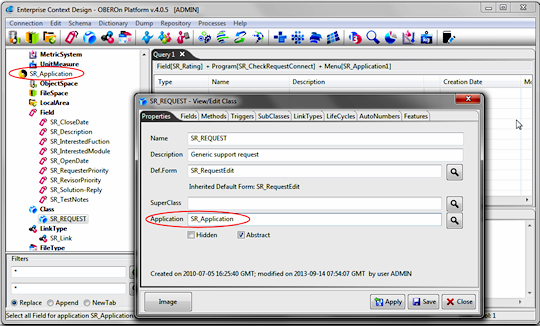
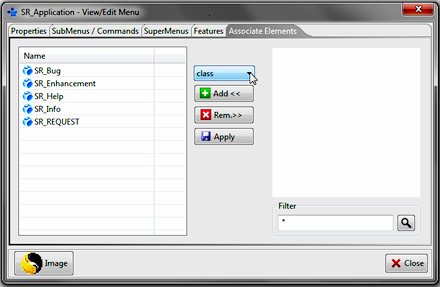
In the Enterprise Context Design tool the application menus are displayed with different icons (the admin user can load specific images for them): they add new entries in the navigator panel and you can find under the tree structure only the administrative elements associated with them.
These associations can be created for each single administrative element in the related form or directly inside the application menu form for multiple elements.
Users enabled
to manage commands (see user
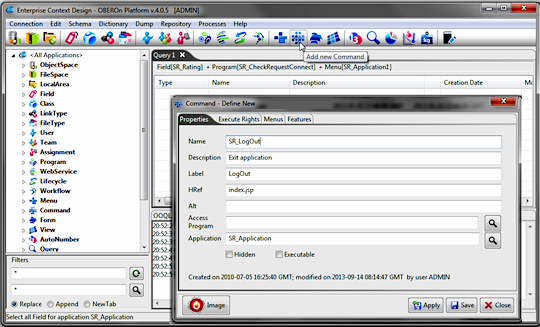
access rights For example you can may a LogOut command:
The equivalent OOQL
command
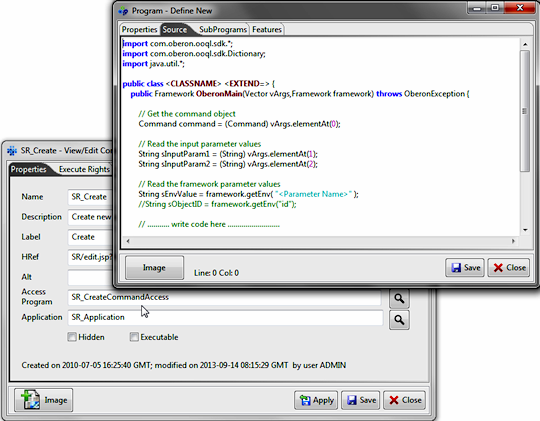
If a command is executable, the Href value must include a program name as follow:
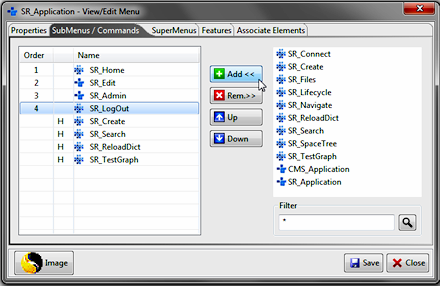
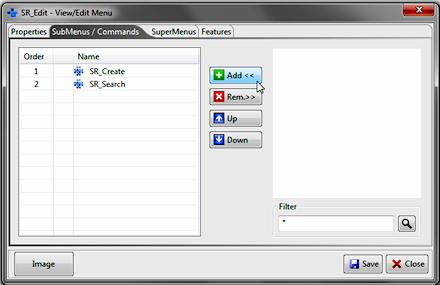
For connecting a command or a sub-menu to a parent menu, you have to: open the menu form (double click on the menu object from the working tab or from the administration object tree on the left), go to the "SubMenus / Commands" tab, searching and add them in the order to you want in the user interface.
The same steps can be repeated for the
sub-menu to add a child menu or a command and generate the entire
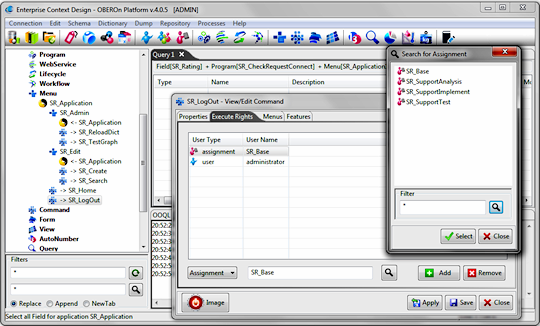
hierarchy. After completed the menu structure, you have to define the user access rights for each command, in other words, you have to indicate the users that can access to the command and so execute it. This association can be done by opening the command form and adding the enabled users / teams / assignments in the "Execute Rights" tab.
If the user roles are not sufficient to define the correct access for a specific command, it is possble to extend the control by adding an Access program. The java code can perform any check; if it raises an exception the command will not be visible in the user menu tree. At the same time, a sub-menu is not visible if no one of its childrens is visible: the final tree will include only the branches that have at least a valid command.
|
|||||||||||||||
Please Read: Privacy Policy and Terms of Use